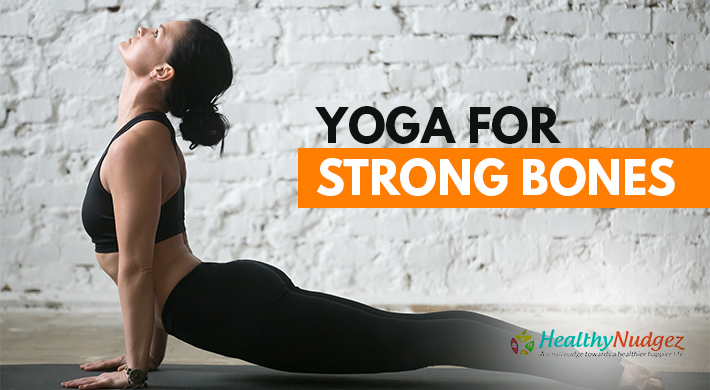
Yoga for Strong Bones
Osteoporosis (from the Greek “porous bone”) is a disease in which bones become less dense, predisposing them to fractures.
Yoga may be an effective part of the treatment for osteoporosis: A recent small study found that practicing yoga for as little as eight to ten minutes daily can increase bone density. With a regular practice, yoga will improve strength, flexibility, balance, coordination, endurance, muscle mass, agility, and energy level—all important for older adults with osteoporosis.
Many of those with low bone density are women: Women are four times more likely to develop osteoporosis than men.
Yoga is a sort of strength training that helps you balance and align your body. When your body is properly aligned, and you can balance, you automatically reduce probable injury. The standing poses strengthen your hips; light back bends build strength in the spine and decompress the vertebrae. Yoga also improves the circulation of blood in the body, which means better absorption of nutrients.
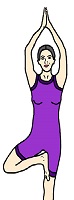
People suffering from osteoporosis can practice yoga with their doctor’s approval and they should always let their teachers know about their condition and their doctor’s recommendations. Start slowly with simple asanas, and then increase the time. Side bending or rotation of the spine should be avoided as it can lead to an increased risk of a fracture. Do not overdo the practice1. Vriksasana (Tree Pose)
Limitations:
It should not be practiced in case of High blood pressure, Low blood pressure, Migraine, Insomnia, Acute knee problems, Hip injury
 Instructions to do the asana:
1. Stand in Tadasana.
2. Bend your right knee and rotate your right thigh outward without turning your pelvis.
3. Lift your right foot and place it above the ankle or knee of your left leg (but not against the knee).
4. Bring palms in front of your chest.
5. Repeat with other leg.
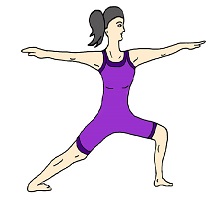
2. Virabhadrasana (Warrior Pose)
Limitataions:
1. People suffering from spinal disorders and High BP should avoid this posture.
2. People who have joint and knee pain should use some support while doing this asana.
 Instructions to do the asana:
1. Stand straight with your legs wide apart by distance of 3 feet.
2. Turn your right foot out by 90 degrees and left foot by 15 degrees.
3. Lift both the arms sideways to shoulder height parallel to the ground.
4. Breathing out bend your right knee. Ensure that your knee does not overshoot the ankle.
5. Turn your head and look to your right.
6. Hold the yoga pose with a smile and determination of a warrior. keep breathing as you hold the pose.
7. Breathing in, come up
8. Breathing out bring your hands down from the sides.
9. Repeat the yoga posture also for left side.
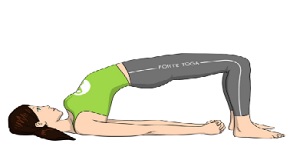
3. Setu Bandha Sarvangasana ( Bridge Pose)
Limitataions:
Do not try or avoid doing this pose if you are suffering from knee, neck and back injuries or pain.
Do the Asana under the supervision of a yoga instructor.
 Instructions to do the asana:
• Lie on your back with knees bent, heels in line with your knees.
• The arms on both the sides and lying on the floor.
• Lift the hips off the floor.
• To come out, gently lower your back to the floor.
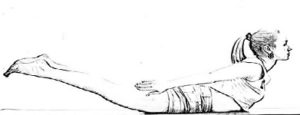
4. Salabhasana, Locust Pose
 Limitataions:
1. People with acute back pain or slip disc, should avoid this pose.
2. People with severe sciatica can bring in more injury here as this pose tightens the entire body from the hip to the feet.
3. People with major problems with menstruation or with a prolapsed uterus should avoid.
4. Women in their pregnancy should avoid this pose.
5. People having Blood Pressure problems, should avoid this pose.
Instructions to do the asana:
1. Lie face-down on your mat with your arms alongside your torso.
2. Lift your chest forward and up as you raise your legs and stretch them out behind you.
3. Lift your upper body and legs without straining, streaming your arms along your torso.
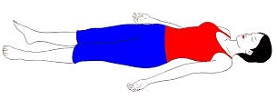
5. Savasana, Corpse Pose
Limitations:
People with low B.P. and depression please avoid it.
 Instructions to do the asana:
1. Lie down on your back. Feet approx. 2-2 ½ feet apart. Hands apart from the body, say about 8-10 inches. Palms facing the ceiling. The body should be aligned straight. Once you are comfortable then there should be no movement in the body. Imagine yourself in a beautiful garden. Follow normal rhythmic breathing.
2. Now, get your attention to the tip of your toes and relax them, now relax your ankles, knees, thighs, arms, anus, reproductive organs, naval, stomach, heart, neck, lips, tip of the nose, eyes, space between your eyebrows, forehead and finally head. Your full body is relaxed now.
3. Slowly bring back your consciousness to your body and make subtle movement of hands and legs.
4. Bring your legs together and making a pillow of your hand turn to one side and rest. Taking support of your hand turn to one side and sit up in cross legged position without opening your eyes. Cup your eyes with your palm and slowly open your eyes.